Last updated: October 2026
By Amardeep Mamidi · Last updated: October 2026
What the best way to remove mold from wood involves
Wood mold removal is not just a matter of applying a chemical to a dark patch. The lasting solution has four parts: stop the moisture, protect occupants and clean areas, physically remove loose mold, and dry the wood completely. If the moisture problem remains, mold can return even after the visible surface looks clean.
Canadian guidance identifies wood as a washable surface when contamination is limited and the material remains sound. Health Canada recommends scrubbing washable surfaces with an unscented soap solution and drying them completely and quickly. It also advises against using bleach for household mold cleanup. Read the Health Canada guidance on moisture and mould indoors for the broader safety framework.
Why the dry-clean-dry sequence matters
Drying first reduces the chance that cleaning spreads moisture deeper into the grain. HEPA vacuuming then removes loose particles without stirring them through the home, while damp cleaning removes remaining surface contamination. A final drying period is essential because a cleaned but damp board can support renewed growth.
The sequence is especially important for framing, roof sheathing, stairs, trim, and other wood that cannot easily be removed. Do not close a wall, reinstall insulation, or coat the surface until the cause of dampness has been corrected and the wood is thoroughly dry.
Surface mold versus damaged wood
Surface growth on structurally sound wood is different from wood that is soft, swollen, crumbling, delaminated, or persistently damp. Cleaning may be appropriate for a small surface problem, but porous materials that have been damaged or deeply colonized may need removal and disposal under controlled conditions.
Do not use a visual colour change as the only test of success. Mold staining can remain after growth has been removed, and a pale surface is not proof that moisture has been resolved. The practical questions are whether the material is sound, whether contamination has been physically removed, and whether the moisture source has stopped.
What to do before you clean mold from wood
Preparation determines whether a small cleanup remains controlled or spreads spores into living areas. Before disturbing the wood, identify how water or humidity reached it, decide whether the affected area is suitable for limited cleaning, and gather protective equipment and drying tools.
Find and correct the moisture source
Look for roof or plumbing leaks, overflowing gutters, condensation, bathroom exhaust that terminates in an attic, poor crawl-space ventilation, and cold surfaces created by missing insulation or air leakage. Ontario guidance describes moisture-source correction as the most important step in controlling mold in buildings.
Do not begin a cosmetic cleanup while an active leak is still wetting the wood. Stop the leak, improve air movement or ventilation where appropriate, and remove standing water. If the source is concealed, a moisture assessment can help identify whether the visible patch is the full extent of the problem.
Decide whether the area is appropriate for limited DIY cleaning
A small, accessible patch on sound wood may be suitable for careful homeowner cleaning. Pause and arrange professional help if growth is widespread, returns after cleaning, extends into insulation or wall cavities, follows significant water damage, or is associated with a persistent musty odour that cannot be traced.
Professional assessment is also sensible when a household member has asthma, severe allergies, a weakened immune system, or another health concern that makes exposure more consequential. Attics, crawl spaces, HVAC systems, and large unfinished areas are difficult to contain with ordinary household equipment.
Prepare PPE and containment
Wear gloves, eye protection, long sleeves, and a properly fitted respirator appropriate to the work. Keep children, pets, and people who are sensitive to mold away from the area. Avoid dry brushing, compressed air, or an ordinary vacuum because those approaches can spread particles.
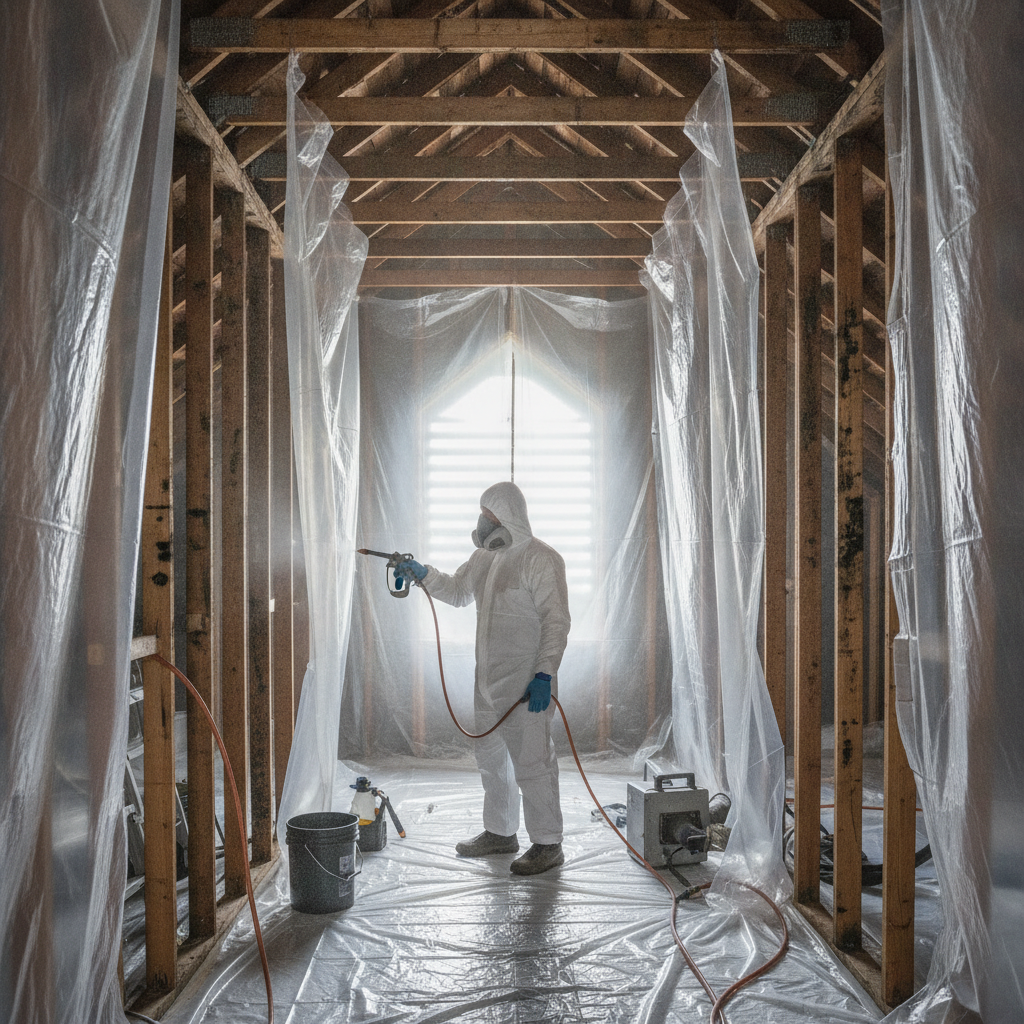
Use plastic sheeting and tape to separate the work zone where practical. A sealed, externally exhausted or true HEPA-equipped vacuum can reduce airborne dust. Do not direct a box fan from the contaminated area toward clean rooms. The aim is controlled airflow, not simply more airflow.
Gather tools that limit moisture and dust
- A moisture meter, if available, to compare damp areas with unaffected wood.
- A true HEPA or externally exhausted vacuum with a suitable brush attachment.
- Unscented soap, clean water, microfiber cloths, and a soft brush.
- Plastic sheeting, tape, disposable cleaning materials, gloves, and eye protection.
- A dehumidifier or other safe drying equipment suited to the room.
Use only enough cleaning solution to dampen the cloth or brush. The objective is to clean the surface without soaking the wood. Test any solution on a hidden area first, especially on finished stairs, flooring, cabinetry, or trim.
Step-by-step: the safest wood mold removal process
The following process is intended for limited surface contamination on sound wood. Stop if the wood becomes soft, the affected area is larger than expected, the containment fails, or cleaning reveals hidden damage.
1. Inspect, photograph, and isolate the area
Record where the growth appears and inspect adjacent surfaces for staining, dampness, or odour. Photographing the area before cleaning can help document the moisture problem and show whether the affected zone expands during inspection.
Isolate the work area as much as the building allows. Remove movable items only after considering whether they are contaminated. Bag disposable materials before taking them through clean rooms, and keep the route to the exterior as short as possible.
2. Dry wet wood before disturbing surface growth
If the wood is visibly wet, begin controlled drying before cleaning. Use dehumidification and safe air movement while avoiding airflow that carries particles into occupied rooms. Drying time depends on thickness, temperature, humidity, ventilation, and the original water source.
Use a moisture meter when possible, but interpret readings in context rather than relying on one number. Compare affected wood with nearby unaffected wood and confirm that readings are stable. Wood should be thoroughly dry before it is enclosed, painted, insulated, or encapsulated.
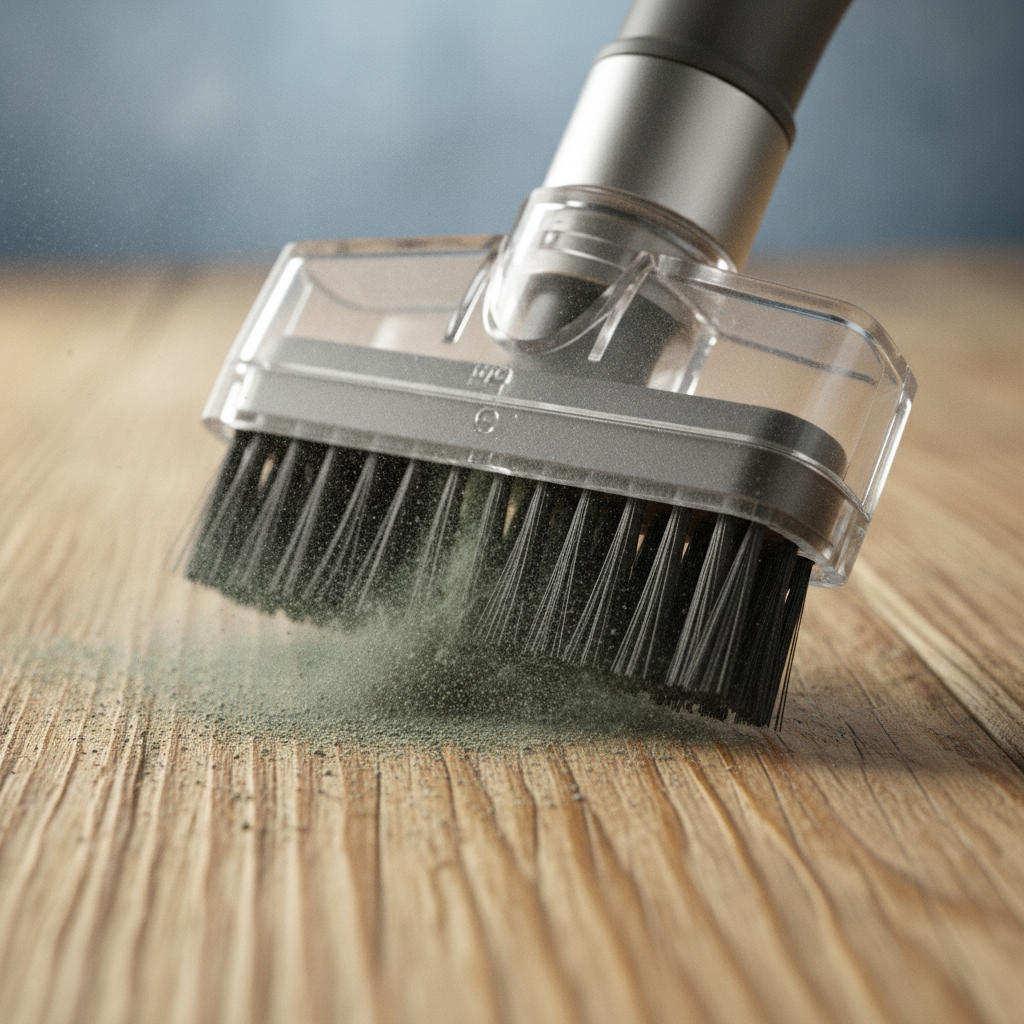
3. HEPA-vacuum loose mold
Once the surface is dry enough to avoid smearing wet contamination, use a HEPA or externally exhausted vacuum to remove loose material. Work slowly, keep the nozzle close to the surface, and use a brush attachment carefully along the grain. Do not press so hard that the brush damages a finish or drives material into cracks.
Canadian housing guidance specifically supports HEPA or externally exhausted vacuuming for loose mold on wood. Vacuuming is a physical removal step; it is not a substitute for correcting moisture or washing the remaining surface.
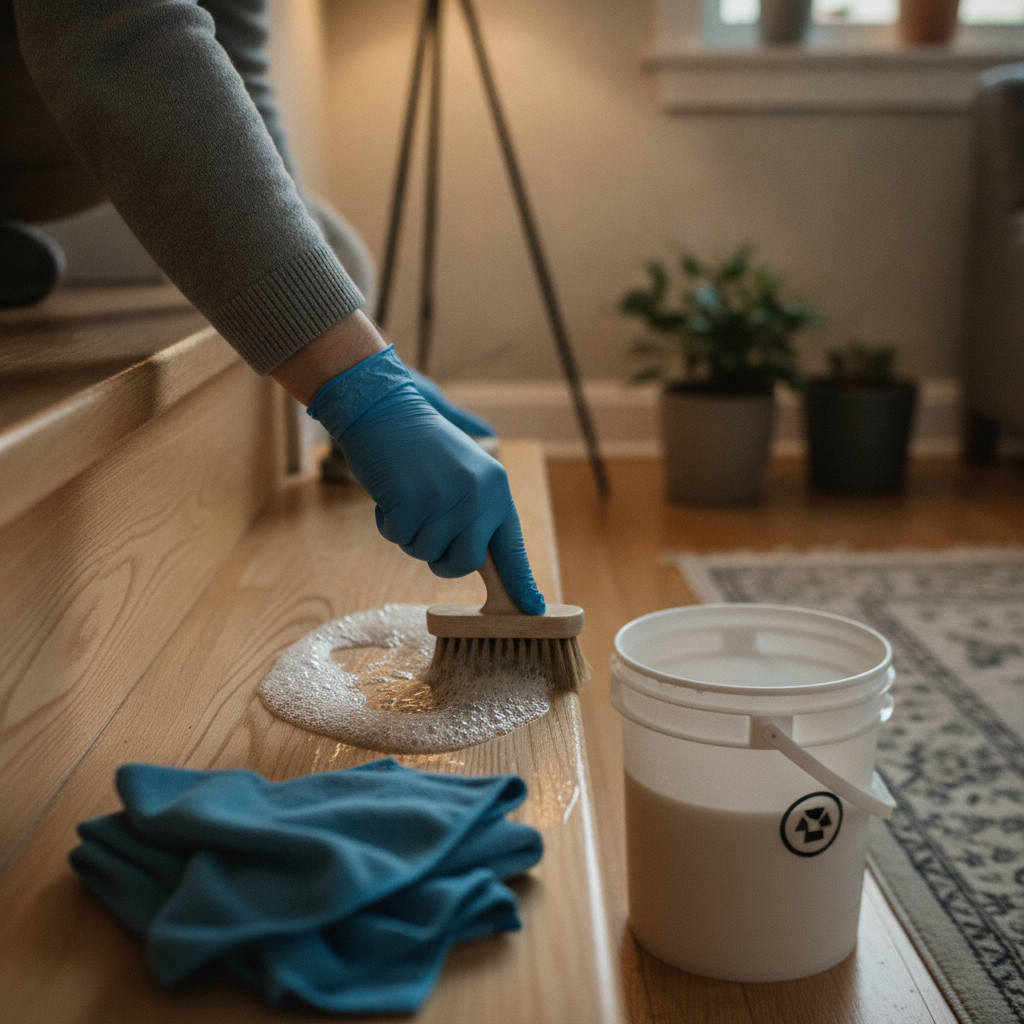
4. Clean with an unscented soap solution
Prepare a modest amount of unscented soap solution according to the product label. Dampen a clean cloth or soft brush rather than pouring solution onto the board. Work in small sections with the grain, changing cloths when they become dirty and avoiding unnecessary scrubbing of delicate finishes.
For accessible solid wood with surface contamination, a clean, damp cloth can lift remaining residue after vacuuming. Use a second clean cloth sparingly if the surface needs wiping. The surface should never be left saturated, and wash water should not be allowed to run into wall cavities, insulation, joints, or flooring.
5. Rinse lightly and dry completely
Where the surface requires it, wipe with a clean, lightly damp cloth to remove soap residue. Immediately support drying with controlled dehumidification and suitable ventilation. Keep the work zone isolated until loose dust and moisture are under control.
Inspect the wood after it dries. A remaining dark mark may be staining rather than active surface growth, but do not assume that appearance alone proves the area is safe. Persistent odour, rising moisture readings, or renewed growth indicates that the investigation is not finished.
6. Reinspect the cause and surrounding materials
Check nearby insulation, drywall, subflooring, framing connections, and concealed corners. Mold often appears where air leakage or condensation keeps a surface colder than the surrounding room. If adjacent porous materials are damaged or cannot be dried, cleaning the visible wood alone may not resolve the problem.
Before restoring the area, repair the leak or condensation pathway. In an attic, this may involve correcting roof drainage, improving soffit or ridge ventilation, sealing air bypasses, or correcting a bathroom exhaust route. The correct repair depends on the building investigation.
How to choose the right wood mold removal response
There is no single cleaner that is safest for every wood surface. The right response depends on the amount of growth, whether the wood is finished, whether it is structurally sound, and whether the source of moisture is understood.
| Situation | Appropriate next step | Why |
|---|---|---|
| Small surface patch on sound, accessible wood | Contain, dry, HEPA-vacuum, clean with unscented soap, and dry again | Limited surface growth may be physically removed without aggressive treatment |
| Finished trim, stairs, or cabinetry | Use a hidden-area test and minimal moisture; consider a finish specialist if damage appears | Excess water and scrubbing can dull, swell, or damage the finish |
| Wet or soft wood | Stop the source and arrange an assessment | Structural or concealed damage may be present |
| Growth across framing, sheathing, insulation, or multiple rooms | Use professional containment and remediation planning | The scale and cross-contamination risk exceed a simple surface cleanup |
| Recurring mold after cleaning | Investigate hidden moisture, condensation, and ventilation | Recurrence usually indicates an unresolved building condition |
Why bleach is not the preferred wood treatment
Bleach is not the recommended answer for porous wood. Health Canada advises not using bleach to clean household mold, and bleach can damage finishes while failing to solve contamination within porous material. A controlled soap-and-water cleaning, followed by thorough drying, is more consistent with current Canadian guidance for washable wood surfaces.
Never mix bleach with other cleaners. More aggressive chemistry does not compensate for poor containment, an active leak, or wet wood. Physical removal and moisture control remain the central tasks.
When sanding, blasting, or coating should wait
Sanding can release contaminated dust and remove wood fibres, so it should not be the first response to a small surface patch. Soda blasting, abrasive cleaning, antimicrobial coatings, and encapsulation may have a role in specialized remediation, but they should follow assessment, physical cleaning, and drying rather than conceal an unresolved problem.
A coating cannot make wet or contaminated wood safe by itself. If a finish or encapsulant is considered, confirm that the surface is clean and dry and follow the product instructions. Coating over active growth or trapped moisture can make later investigation more difficult.
Scarborough moisture risks that can bring mold back
In Scarborough and elsewhere in Ontario, wood mold problems commonly involve changing outdoor humidity, winter condensation, roof leaks, and ventilation shortcomings. Seasonal conditions do not create mold on their own; they expose building weaknesses that allow wood to remain damp for too long.
Attic condensation and ventilation
During cold weather, warm indoor air can move through ceiling penetrations and condense on cold roof sheathing. Bathroom fans that discharge into an attic can add significant moisture. Cleaning the sheathing without correcting those pathways often leads to a repeat problem.
Inspect soffit and roof ventilation, insulation coverage, recessed lights, plumbing penetrations, and exhaust ducts. Avoid blocking intended ventilation with insulation, and have building changes reviewed when the cause is uncertain.
Basements, crawl spaces, and plumbing leaks
Basement framing can remain damp after seepage, flooding, or condensation on cold foundation surfaces. Crawl spaces may have limited access, making it difficult to see whether wood has dried throughout its thickness. Plumbing leaks can also wet framing behind finishes long after the visible water has disappeared.
Use moisture readings and a careful inspection rather than treating only the darkest area. If drywall, insulation, or other porous materials were affected, they may require separate removal or drying decisions.
When to call a professional mold remediation company
Call a qualified remediation company when the contamination is extensive, hidden, recurring, or connected to major water damage. Professional help is also appropriate when you cannot safely establish containment, when HVAC equipment may be affected, or when documentation is needed for a sale, purchase, tenancy, insurance matter, or commercial property.
ASM Mold Removal Inc. serves Ontario with same-day response for urgent issues, beginning with inspection and moisture assessment. The company works in attics, basements, crawl spaces, HVAC areas, homes, offices, retail properties, warehouses, schools, and healthcare facilities. Services include containment, HEPA filtration, remediation, and repairs or restoration when needed.
What a professional assessment should clarify
- Where the moisture came from and whether it is still active.
- Which materials have visible or concealed contamination.
- Whether wood is structurally sound and suitable for cleaning.
- How the work area will be contained and how airborne particles will be controlled.
- Which materials can be cleaned, which must be removed, and how drying will be verified.
- What documentation, inspection, warranty, or prevention plan will be provided after the work.
A professional process should focus on removal and prevention, not simply on applying a strong-smelling product. Ask how the source will be corrected and how the finished area will be checked before it is closed or restored.
Common mistakes that make wood mold worse
Cleaning before stopping the leak
A clean-looking surface can become contaminated again if rainwater, plumbing water, or humid air continues to reach the wood. Source correction should be part of the same plan as cleaning, not an afterthought.
Using too much water
Wood absorbs water, and excessive wetting can swell boards, damage finishes, and extend drying time. Apply solution to the cloth or brush and work in small sections instead of flooding the surface.
Using a household vacuum or dry brush
Ordinary vacuums may exhaust fine particles back into the room. Dry brushing can disturb spores and contaminate nearby surfaces. Use appropriate HEPA or externally exhausted equipment and controlled movements.
Painting over staining
Paint can hide a mark without addressing active growth or moisture. Treat coatings as a possible final restoration step only after physical cleaning, drying, and source correction.
Closing damp cavities
Insulation, drywall, flooring, or trim should not be replaced over damp wood. Verify drying and inspect concealed areas first. If the moisture source cannot be found, closing the cavity can make the next inspection more difficult.
Frequently asked questions
What is the best way to remove mold from wood naturally?
For a small amount of surface mold on sound wood, the most important steps are moisture-source correction, controlled drying, HEPA vacuuming, and cleaning with an unscented soap solution. “Natural” does not mean risk-free, and vinegar or essential oils are not substitutes for physical removal, containment, and drying.
Can moldy wood be cleaned instead of replaced?
Sometimes. Sound wood with limited surface contamination may be cleaned after it is dried, while soft, crumbling, swollen, deeply damaged, or persistently wet material may need removal. The decision depends on contamination extent, wood condition, access, and whether the source has been corrected.
Should I use bleach on moldy wood?
No. Bleach is not the preferred treatment for porous wood, and Health Canada advises against using it for household mold cleanup. Use careful physical cleaning with an unscented soap solution and dry the wood thoroughly, or arrange professional remediation when the problem is extensive.
How can I tell whether mold will come back?
Recurrence is likely when the leak, condensation, humidity, or ventilation problem remains unresolved. Check surrounding materials, compare moisture readings with unaffected wood, and monitor the area after drying. New growth, persistent odour, or rising moisture readings means the source needs further investigation.
Can I remove mold from attic wood myself?
A small accessible patch may be manageable with proper PPE, containment, HEPA equipment, soap cleaning, and drying. Attic work becomes unsuitable for casual DIY when growth is widespread, insulation is affected, access is difficult, exhaust ducts or roof leaks are involved, or airborne particles could enter the home.
Conclusion: remove the mold and fix the moisture
The best way to remove mold from wood is a controlled process, not a single spray. Stop the water or humidity source, dry the material, HEPA-vacuum loose growth, clean sound wood with an unscented soap solution, and dry it thoroughly before restoration. If the wood is damaged, the contamination is widespread, or growth returns, professional assessment is the safer next step.
For Scarborough homes and properties across Ontario, ASM Mold Removal Inc. can assess moisture, establish containment, perform remediation, and help with restoration and prevention planning. Contact ASM Mold Removal Inc. for an Ontario mold inspection and remediation assessment.


